Showing posts with label tutorial. Show all posts

Saturday, July 20, 2019

Tutorial - Lined Tote Bag

  Lined Tote Bag
½ yard focus fabric
       ½ yard lining fabric
       1 ½ yard 1” grosgrain ribbon or webbing for handles
       coordinating thread
Cut focus fabric & lining.
1.  Cut 2 16” x 14” (or whatever size you desire) rectangles from the focus fabric.   

2.  Cut 2 16” x 14” (or whatever size you desire) rectangles from the lining fabric.
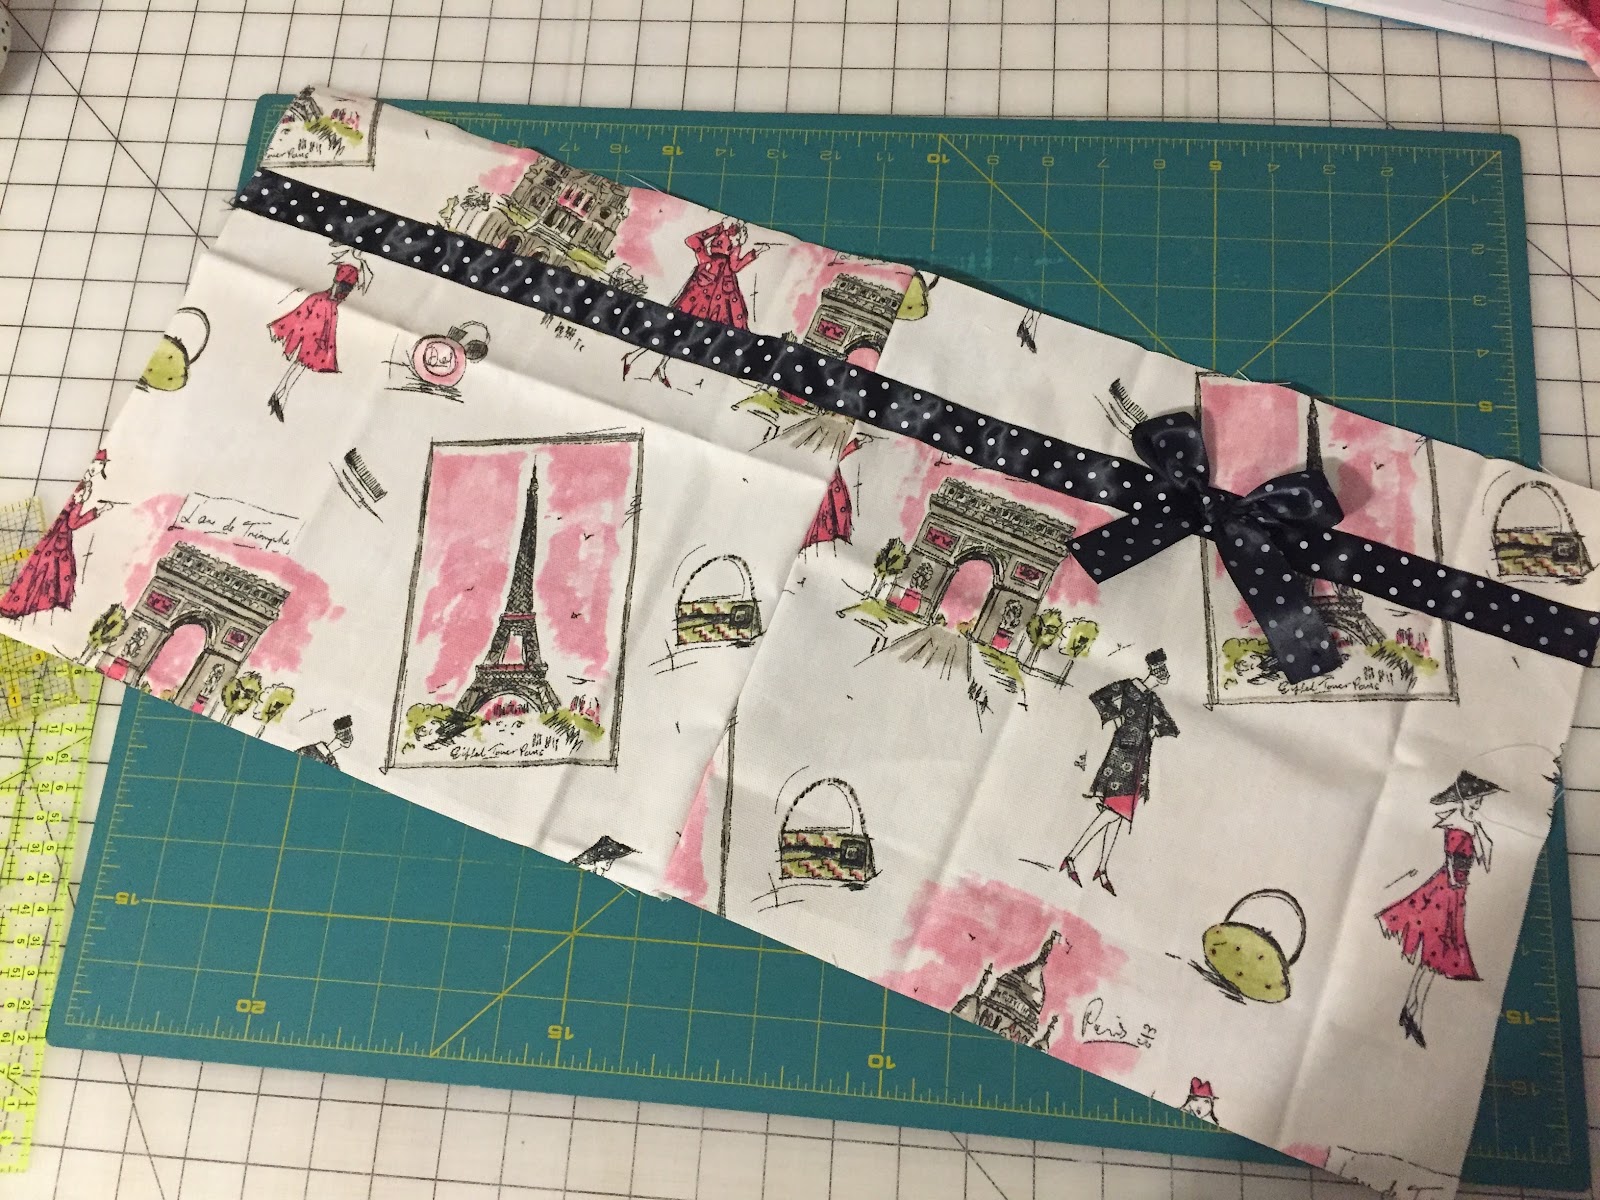
Sew side seam.  Decorate if desired.
3.  Place focus fabric rectangles right sides together.  Sew 1 short side.
Open and press. If you are adding decoration or pockets now is the time!

4.  Place lining fabric rectangles right sides together.  Sew 1 short side.
Open and press. If you are adding inside pockets now is the time.
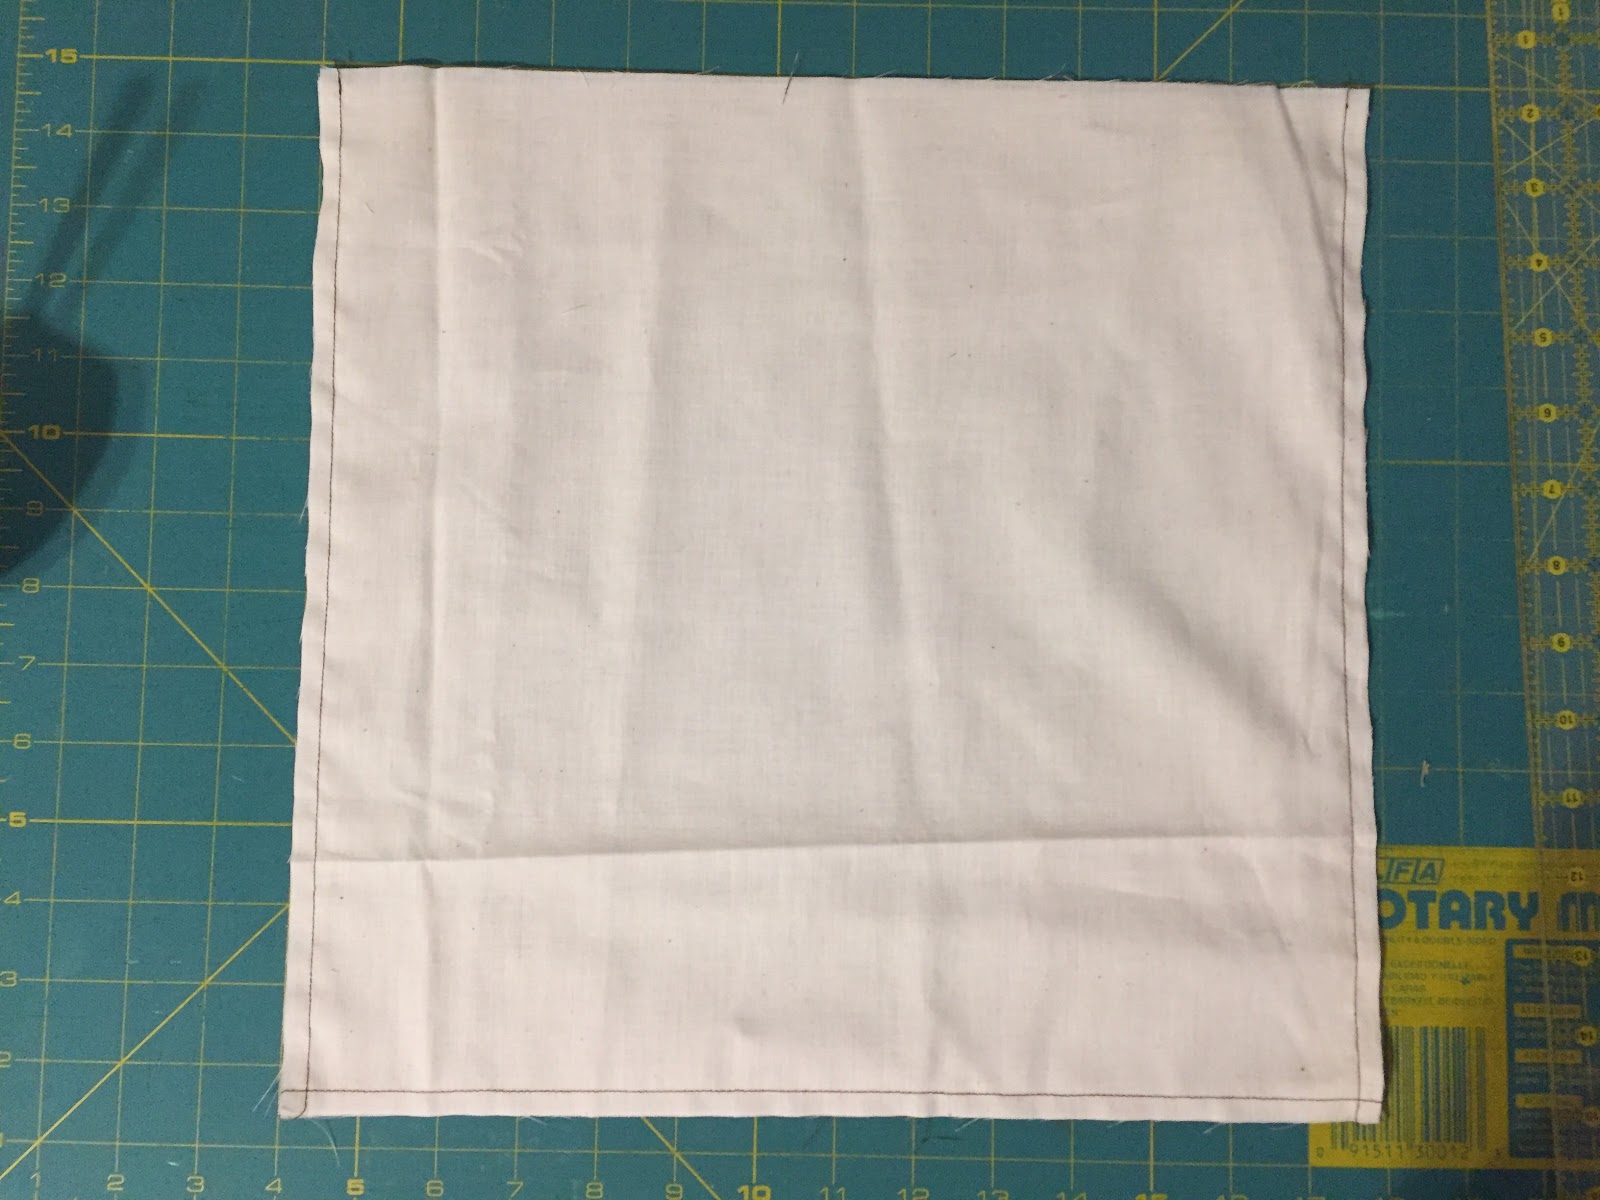
Sew remaining 2 sides.
5.  Fold focus fabric panel in half and sew 1 long side (bottom) and the remaining
short side (side).  

6.  Fold lining panel in half and sew 1 long side (bottom) and the remaining
short side (side).

Three sides are now sewn.
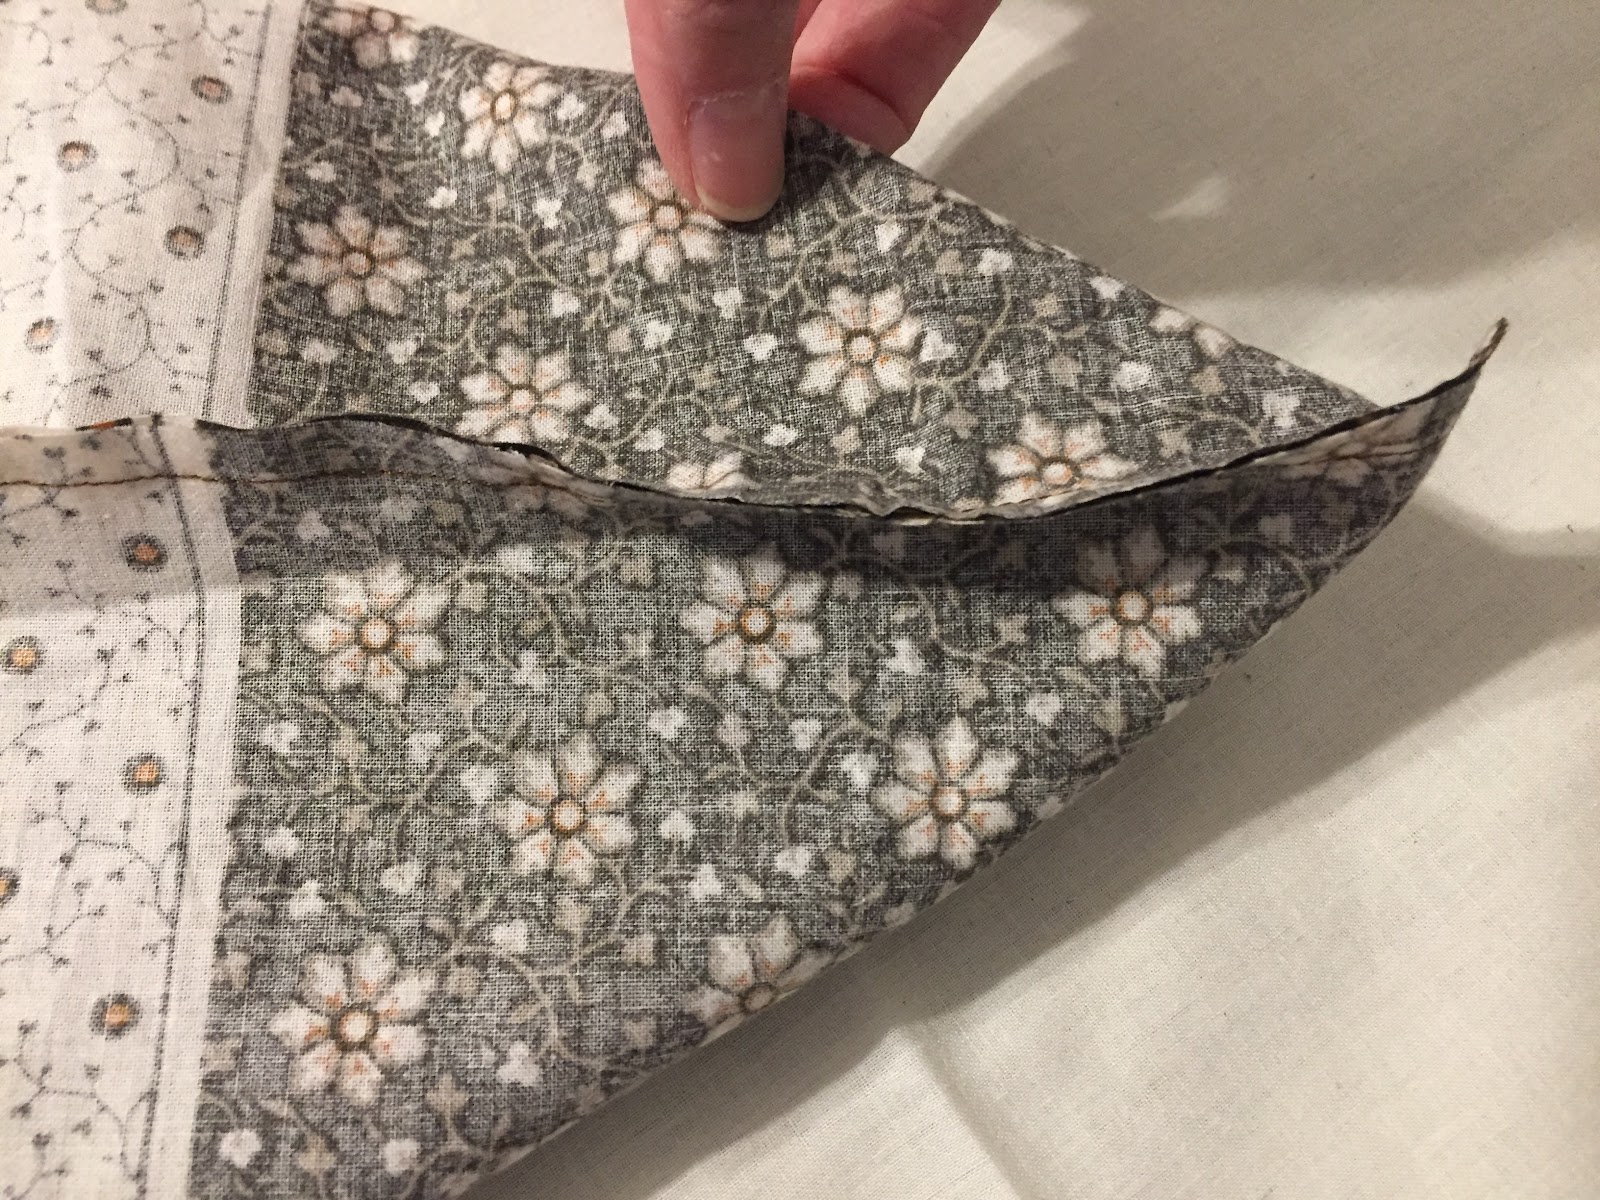
This is the tricky part.  Boxing the corners. 
7.  Grab body of bag between fingers and pull apart near the corners. 
Line up seams so that the corner creates a right angle between the front and
back section and the seam is in the center.
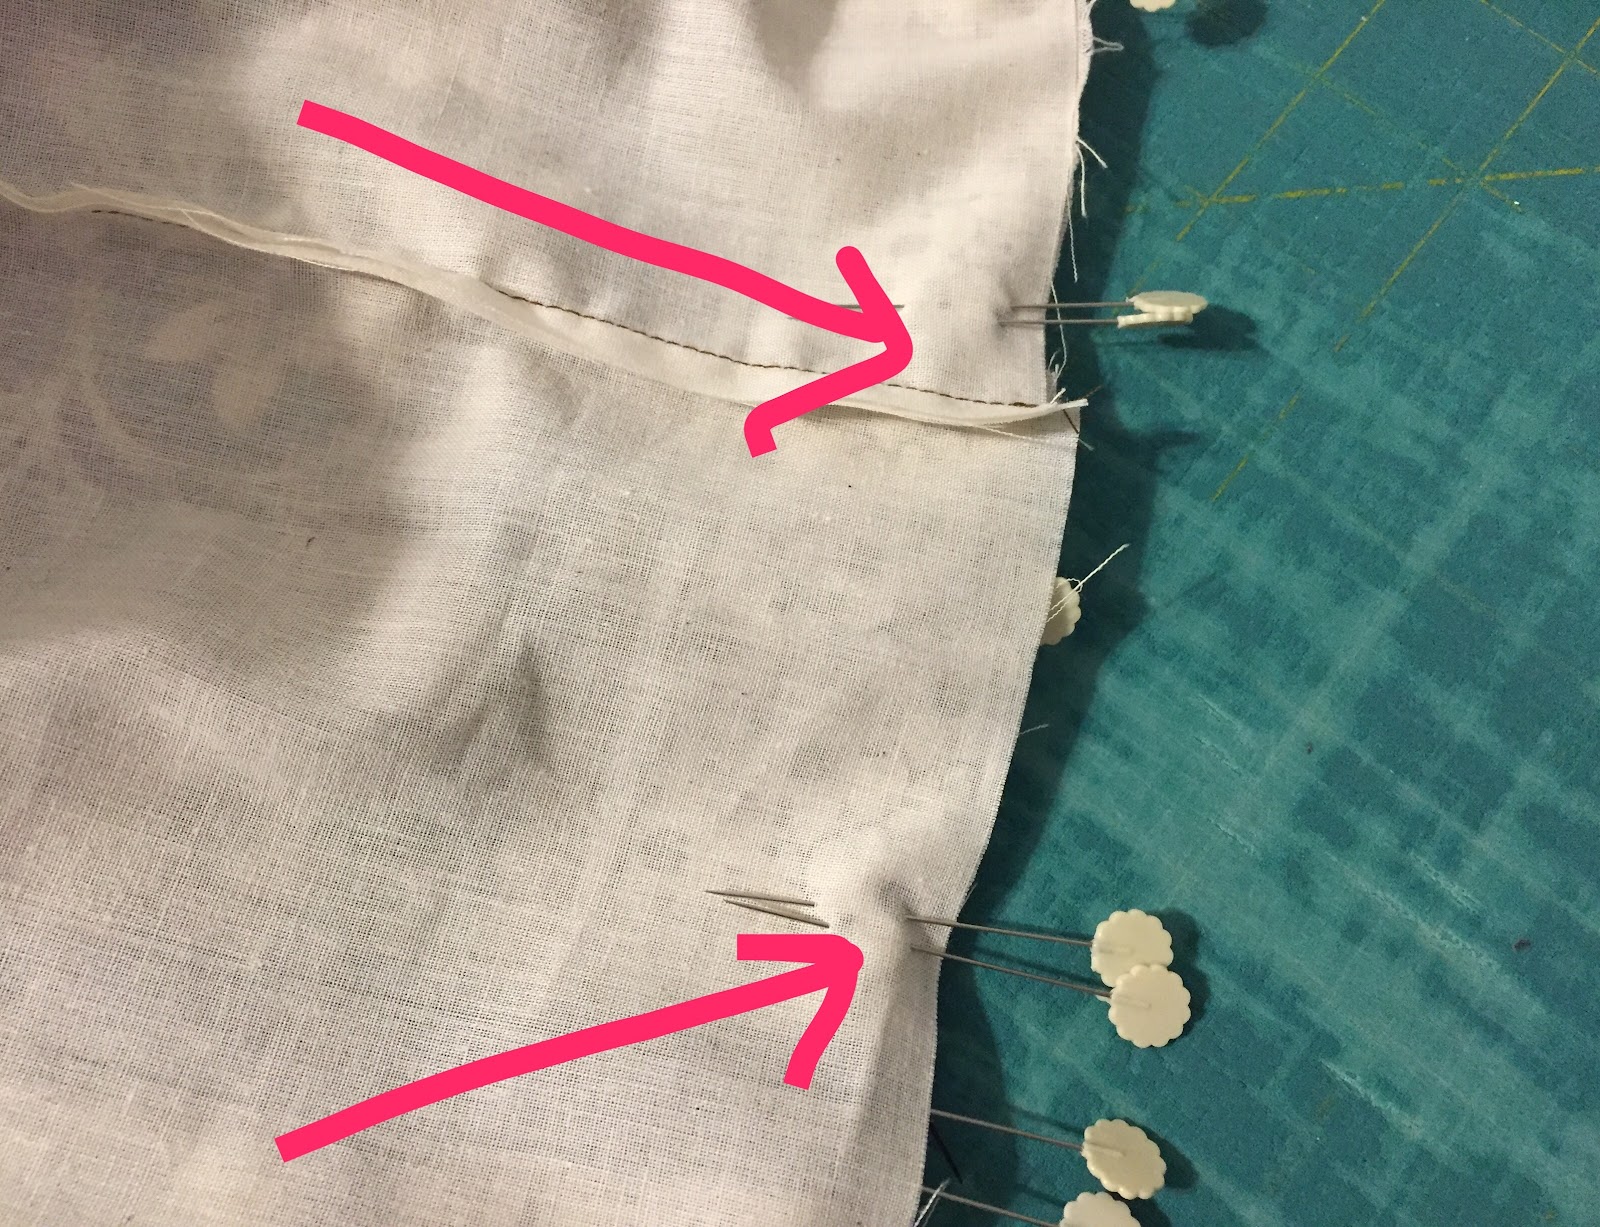
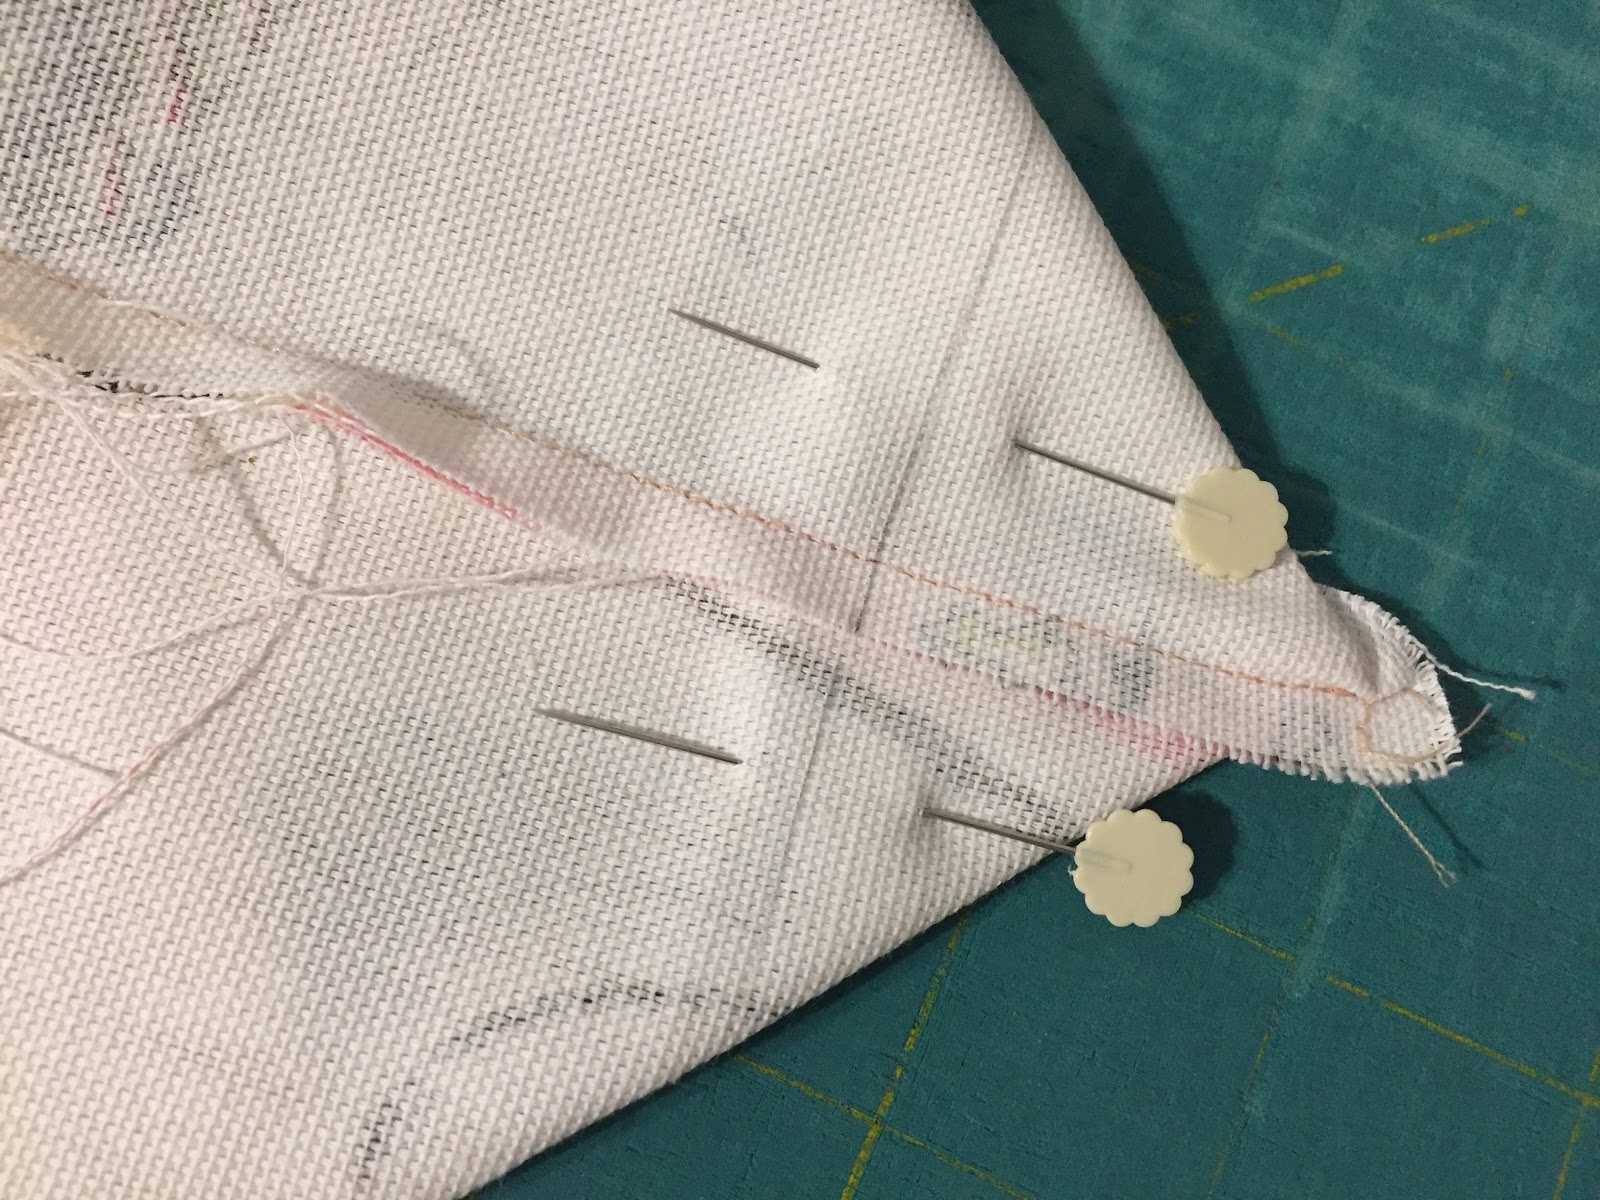
Pin, mark, and .......
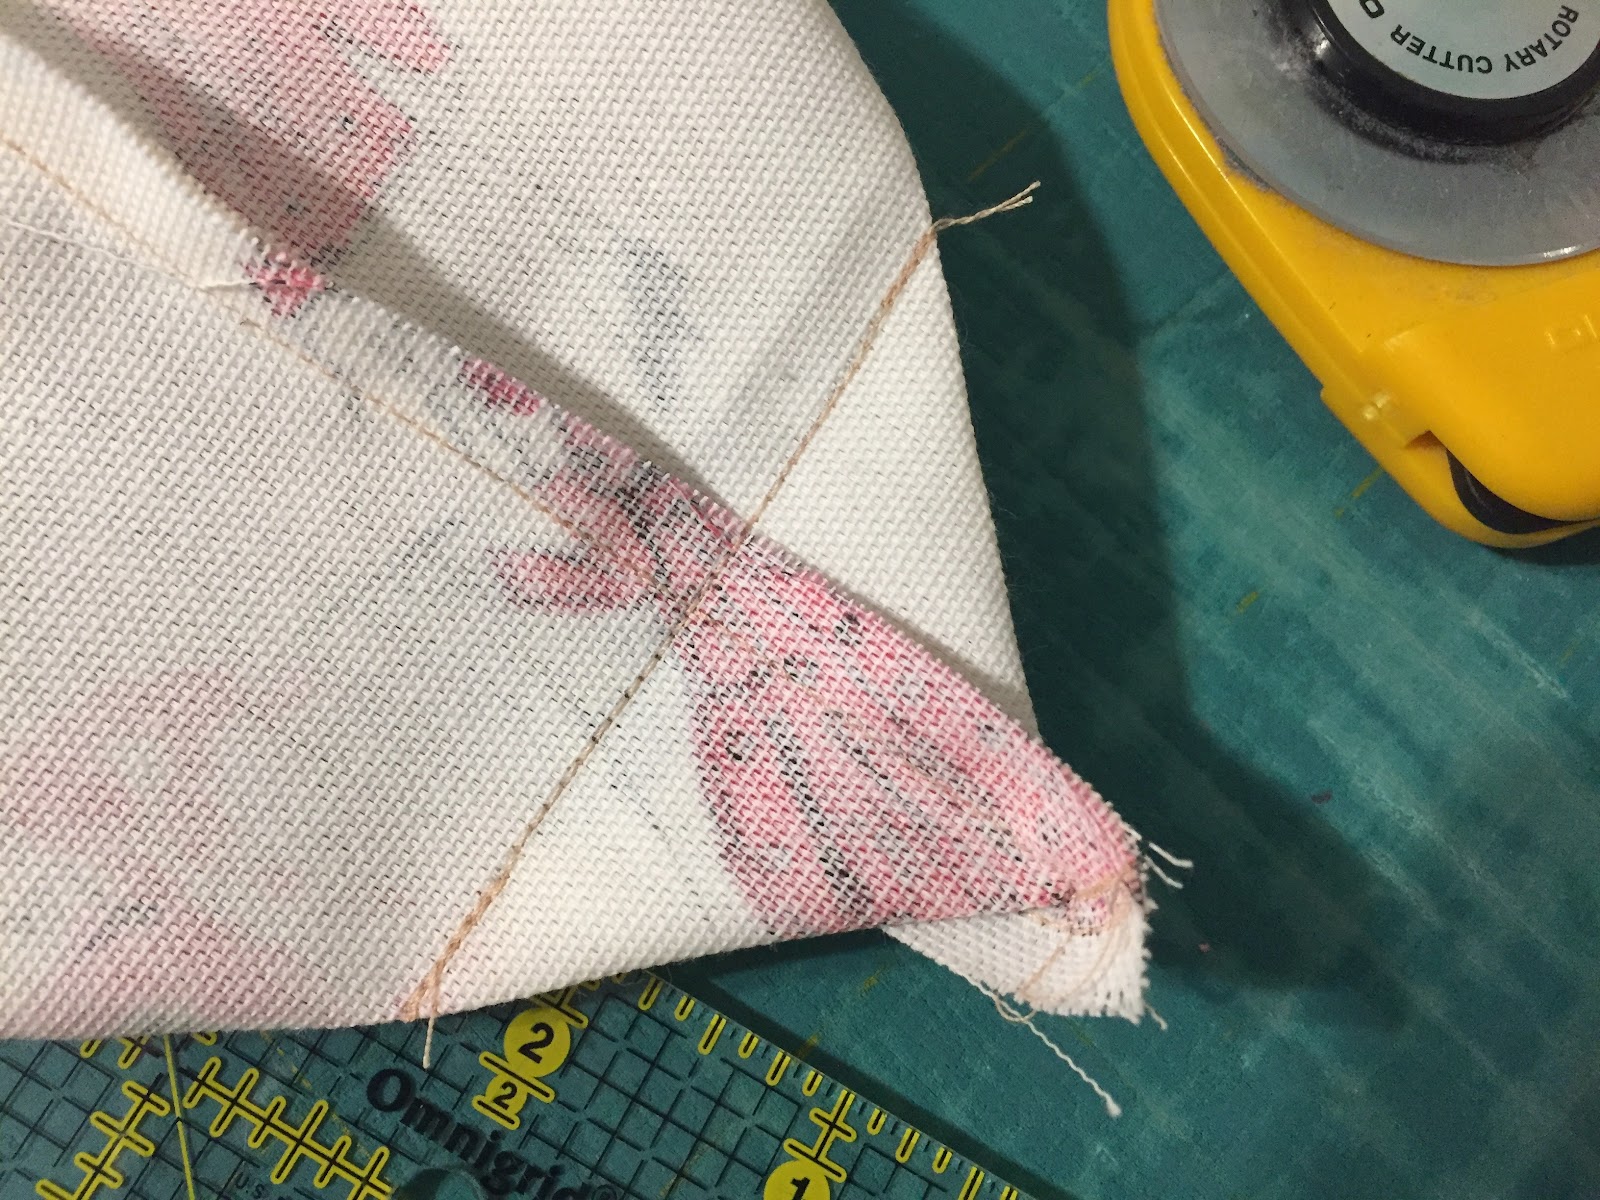
8.  With a ruler - preferably with a right angle marking - center the seam. 
Draw a stitching line. The length of the stitching line will be the width of your bag. 
Pin in place.

9.  Repeat on all corners of outer (focus fabric) bag and lining bag.
........ Sew!
10.  Sew corners.  
Cutting off the excess fabric is optional.
Square them up nicely!
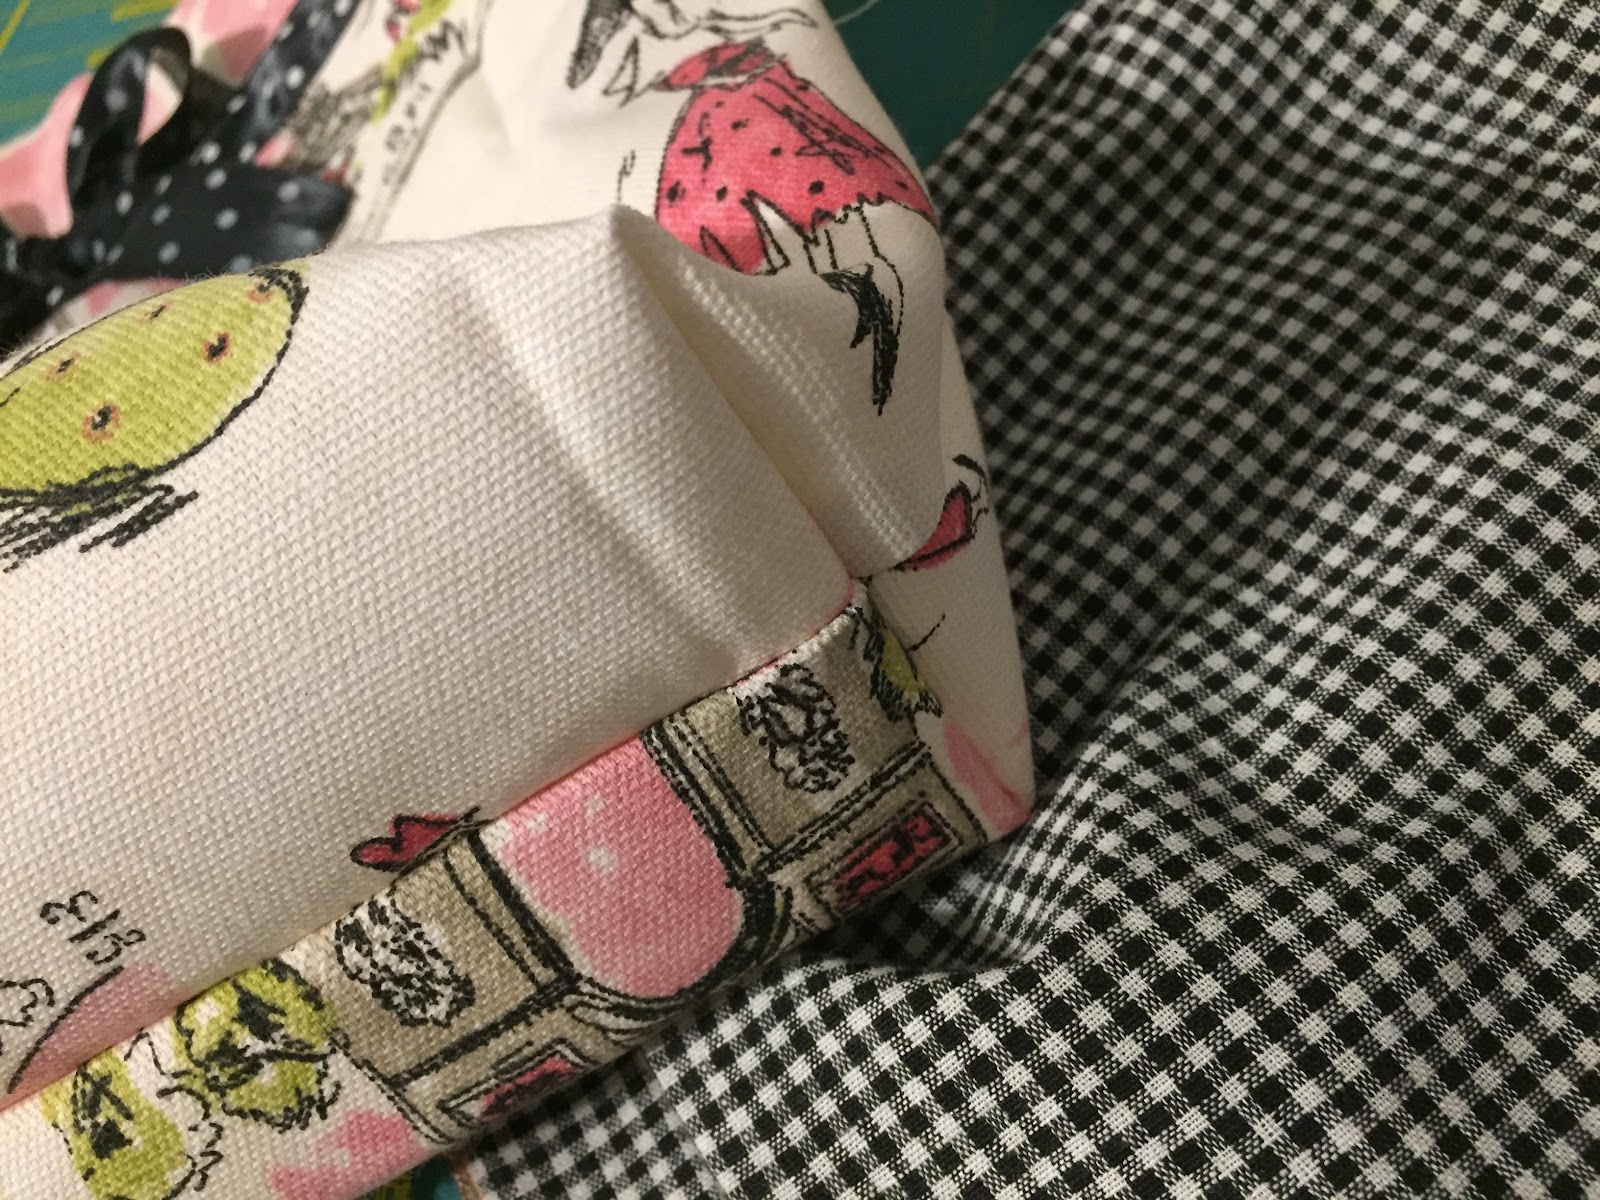
11.  Poke out corners so the bags are nice and square.
Pin straps.
12.  Cut straps the desired length.

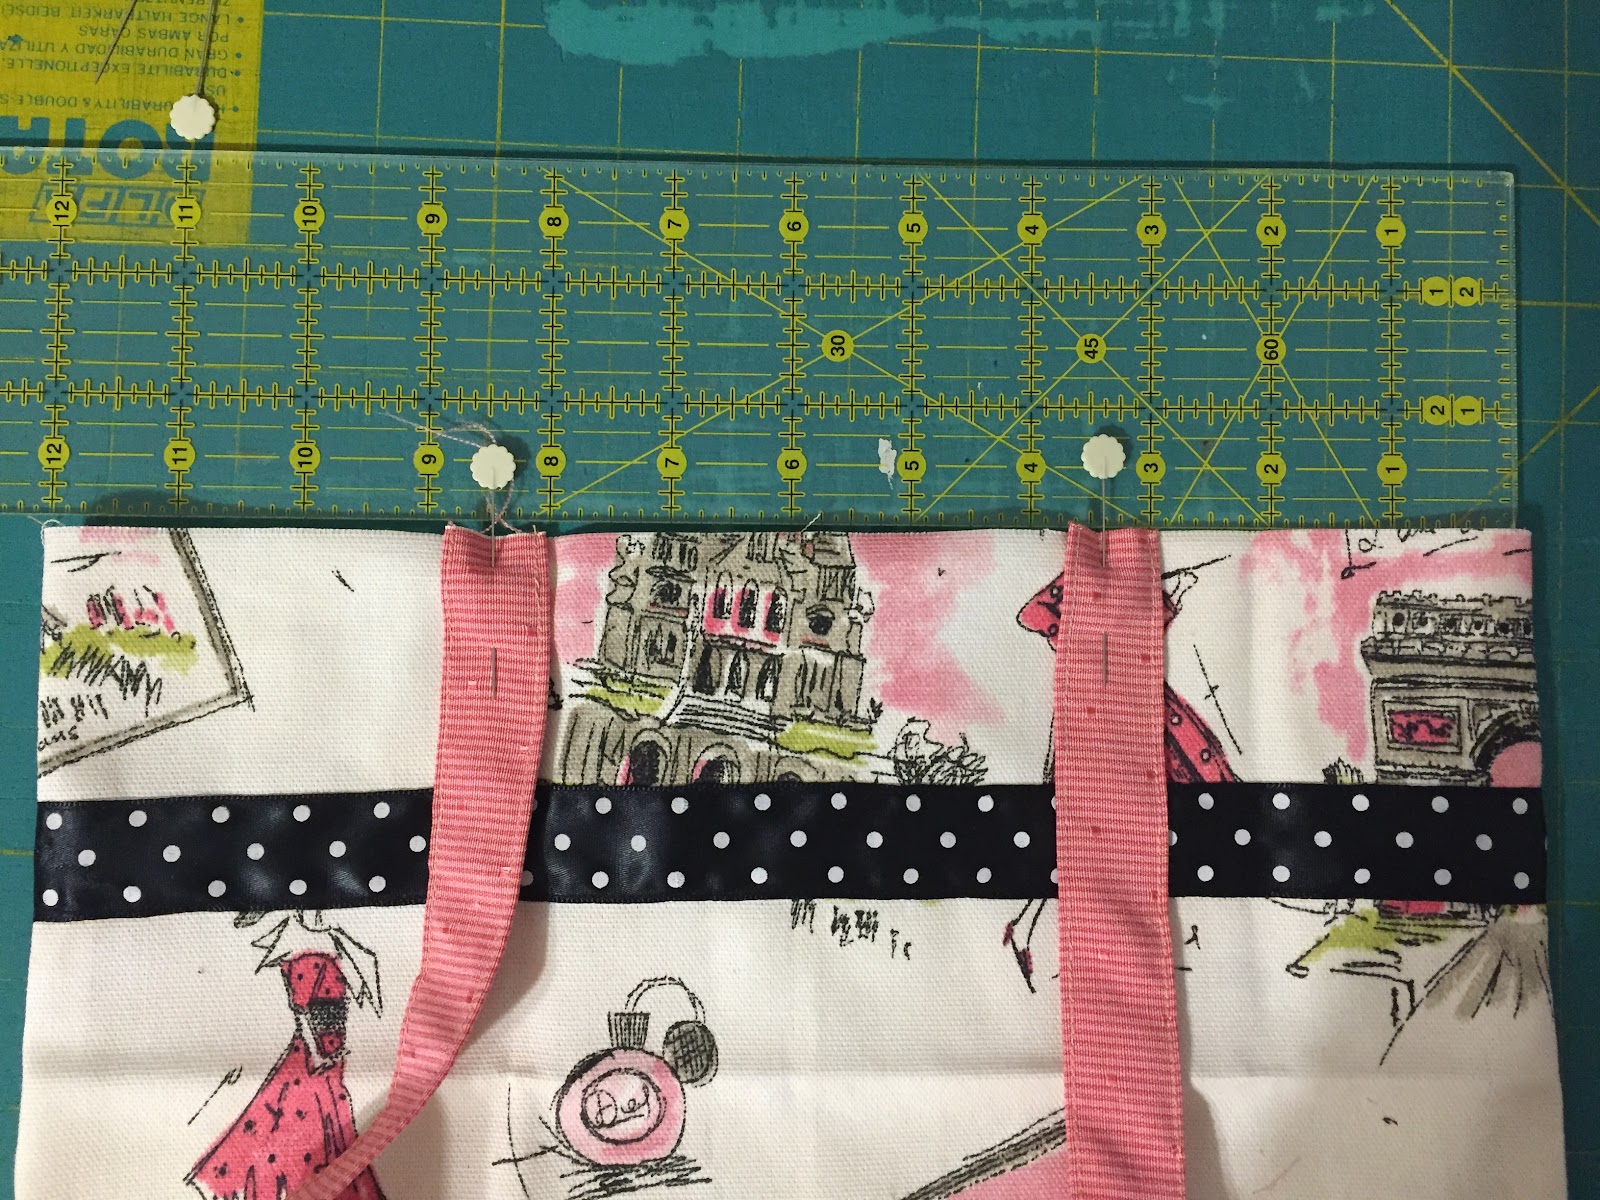
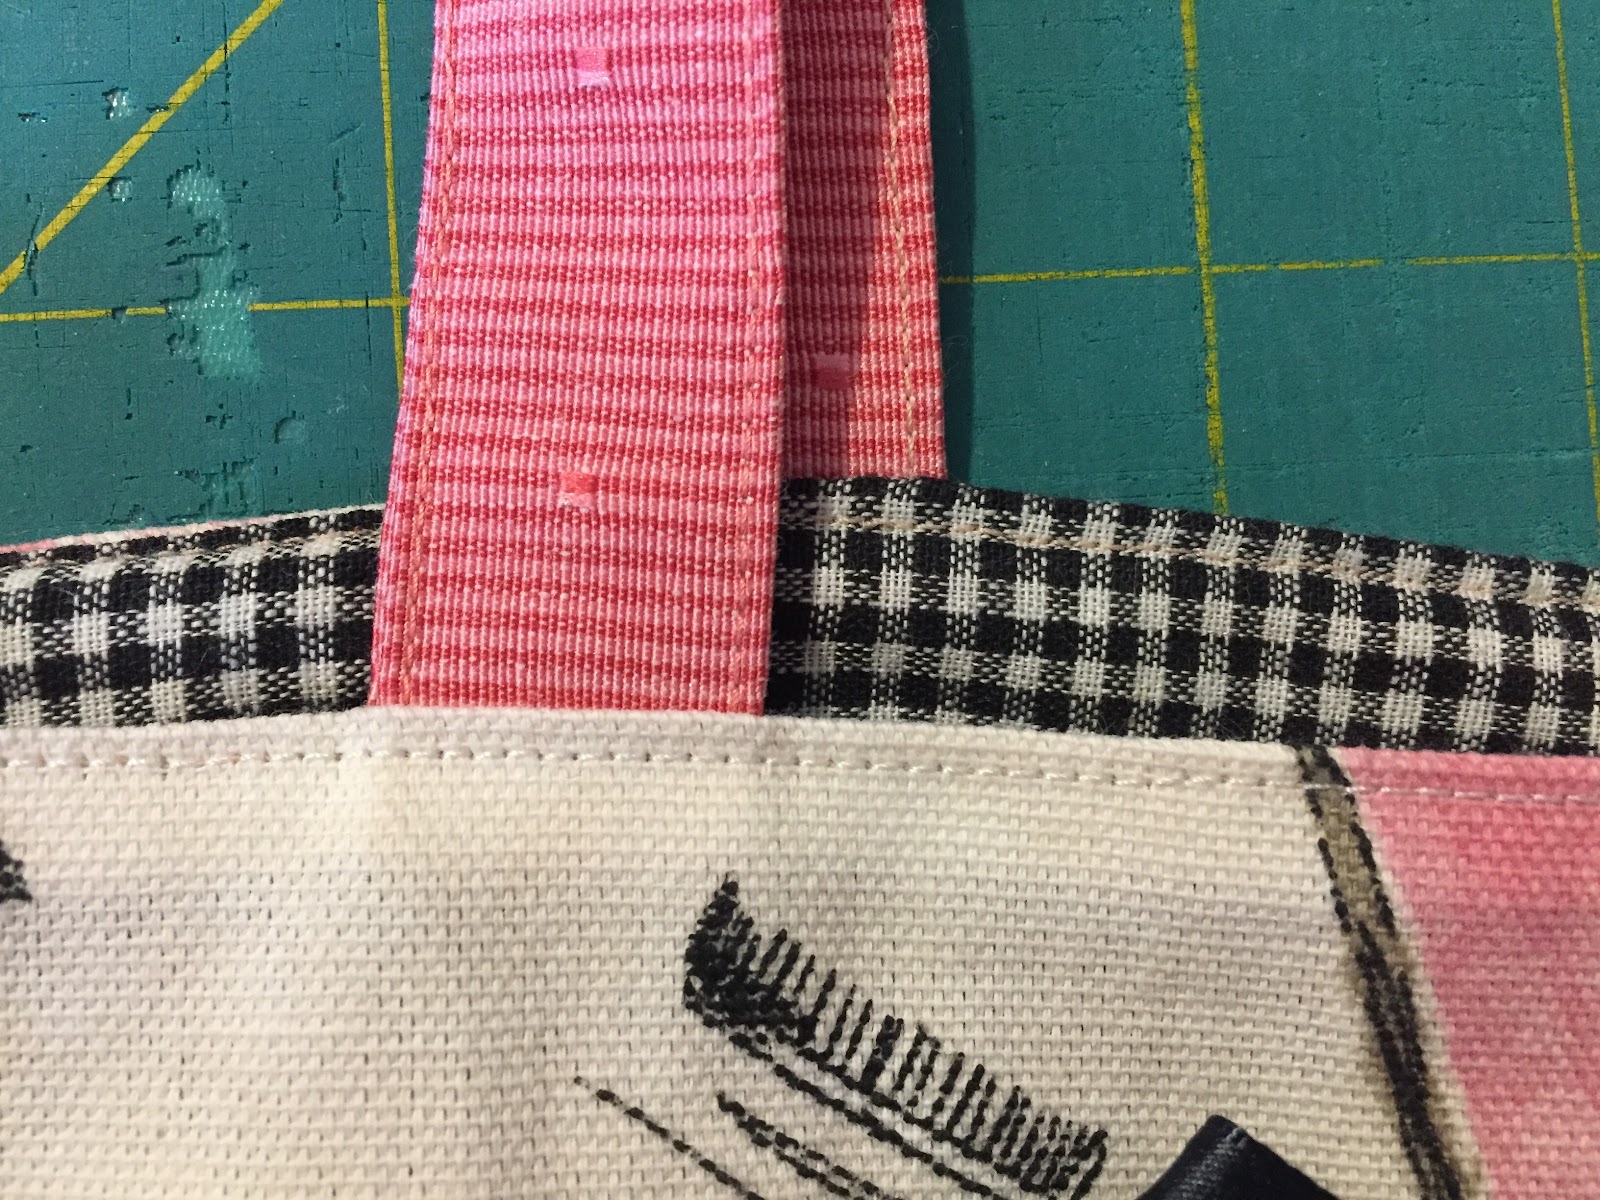
13.  Using a ruler as a guide place straps 3” to 3.5” from the side of the outer bag. 
Make sure right sides are together and straps are not twisted.
Use 2 pins to pin in place so it will stay even with the top.  
Right sides together - very important!
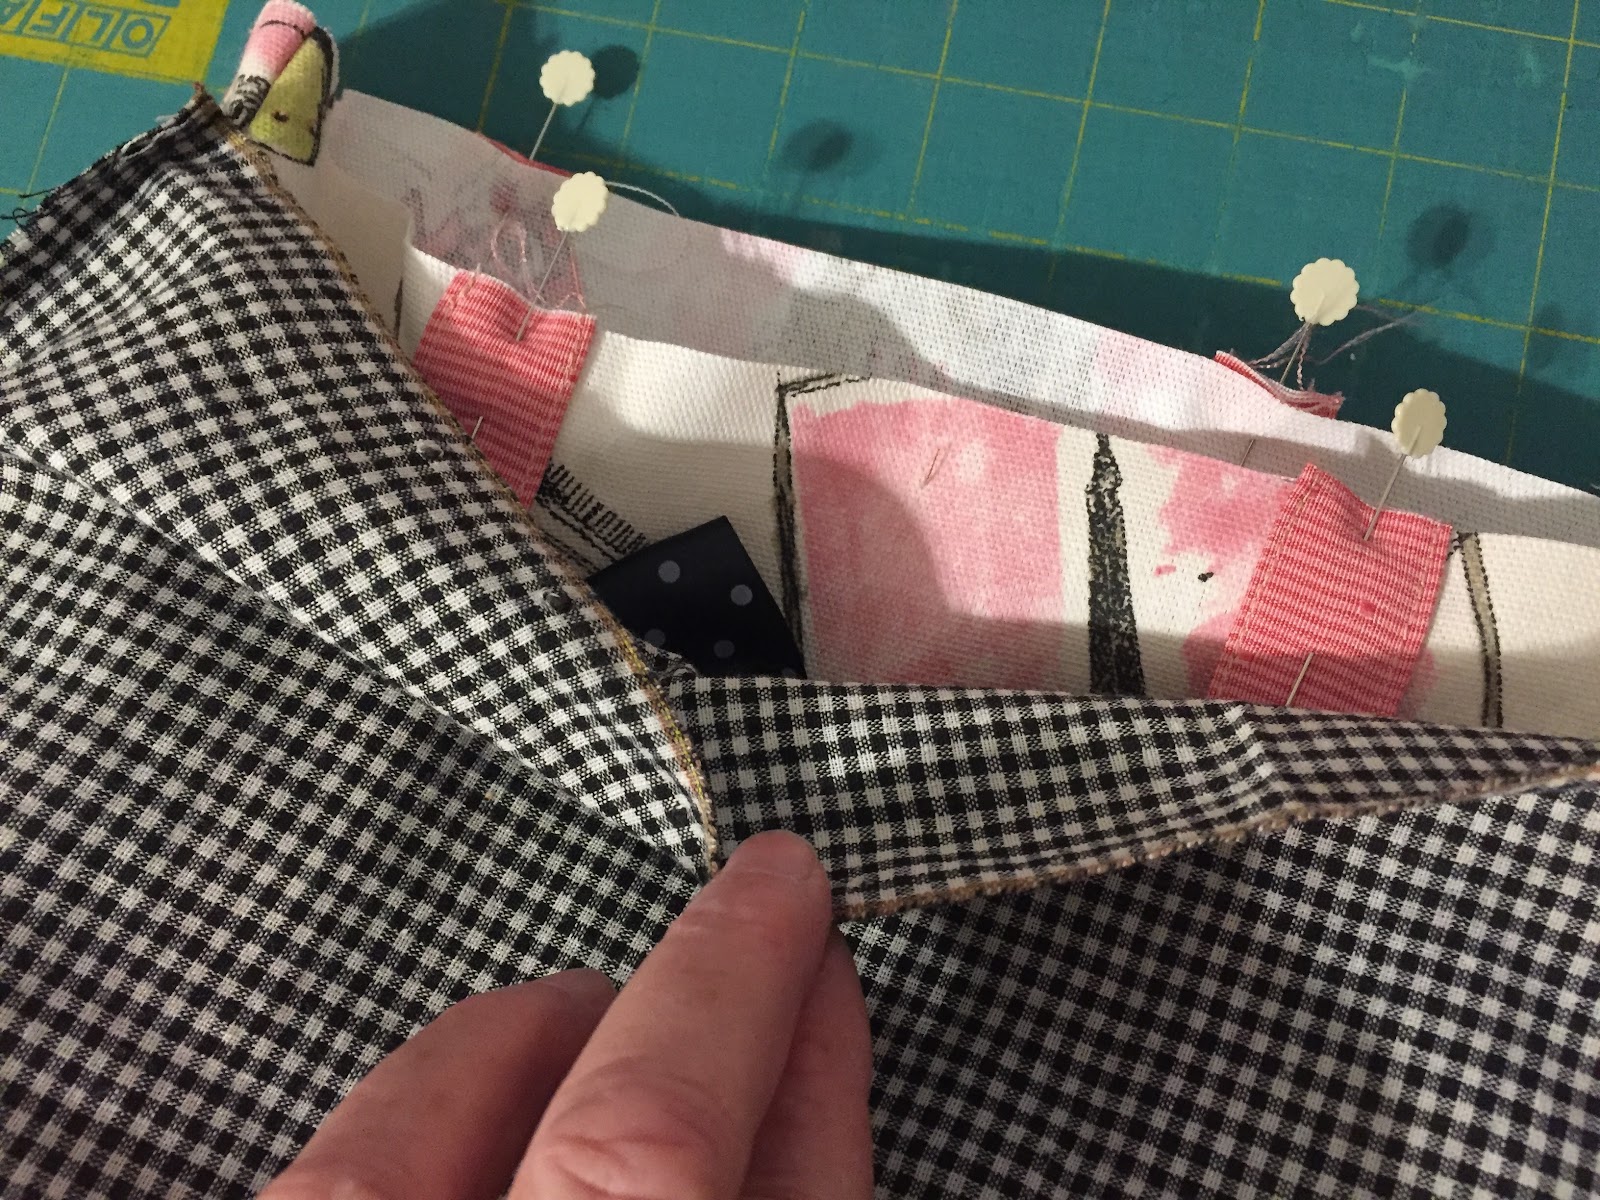
14.  Turn lining bag inside out.  Place outer bag inside lining bag. 
Right sides should be together. Line up tops neatly.  Pin tops together.
Leave an opening - very important!
15.  You will sew around the top leaving a 3” - 4” unsewn opening
Do not leave the opening where the straps are or between the straps. 
Double pin the outer limits of the place that you will leave open.  
Leave an opening - super important!!
16.  Begin sewing the bag top at the double pins on the right and continue
sewing around until you reach the double pins on the left.  Make sure to
back stitch at the start and stop.  

Note: I like to backstitch over each strap after I’ve sewn over it to reinforce it.
Turn right sides out.
17.  Carefully pull the bag sections through the hole that you left open.  
Press the top edge neatly, especially the opening.
18.  Make sure the corners are nice and neat and press everything carefully.

19.  Press the top edge of the bag.  Make sure to press the opening so that it
visually matches the sewn edge.
Top stitch.
20.  Sew around the top edge of the bag making sure to sew the opening closed.
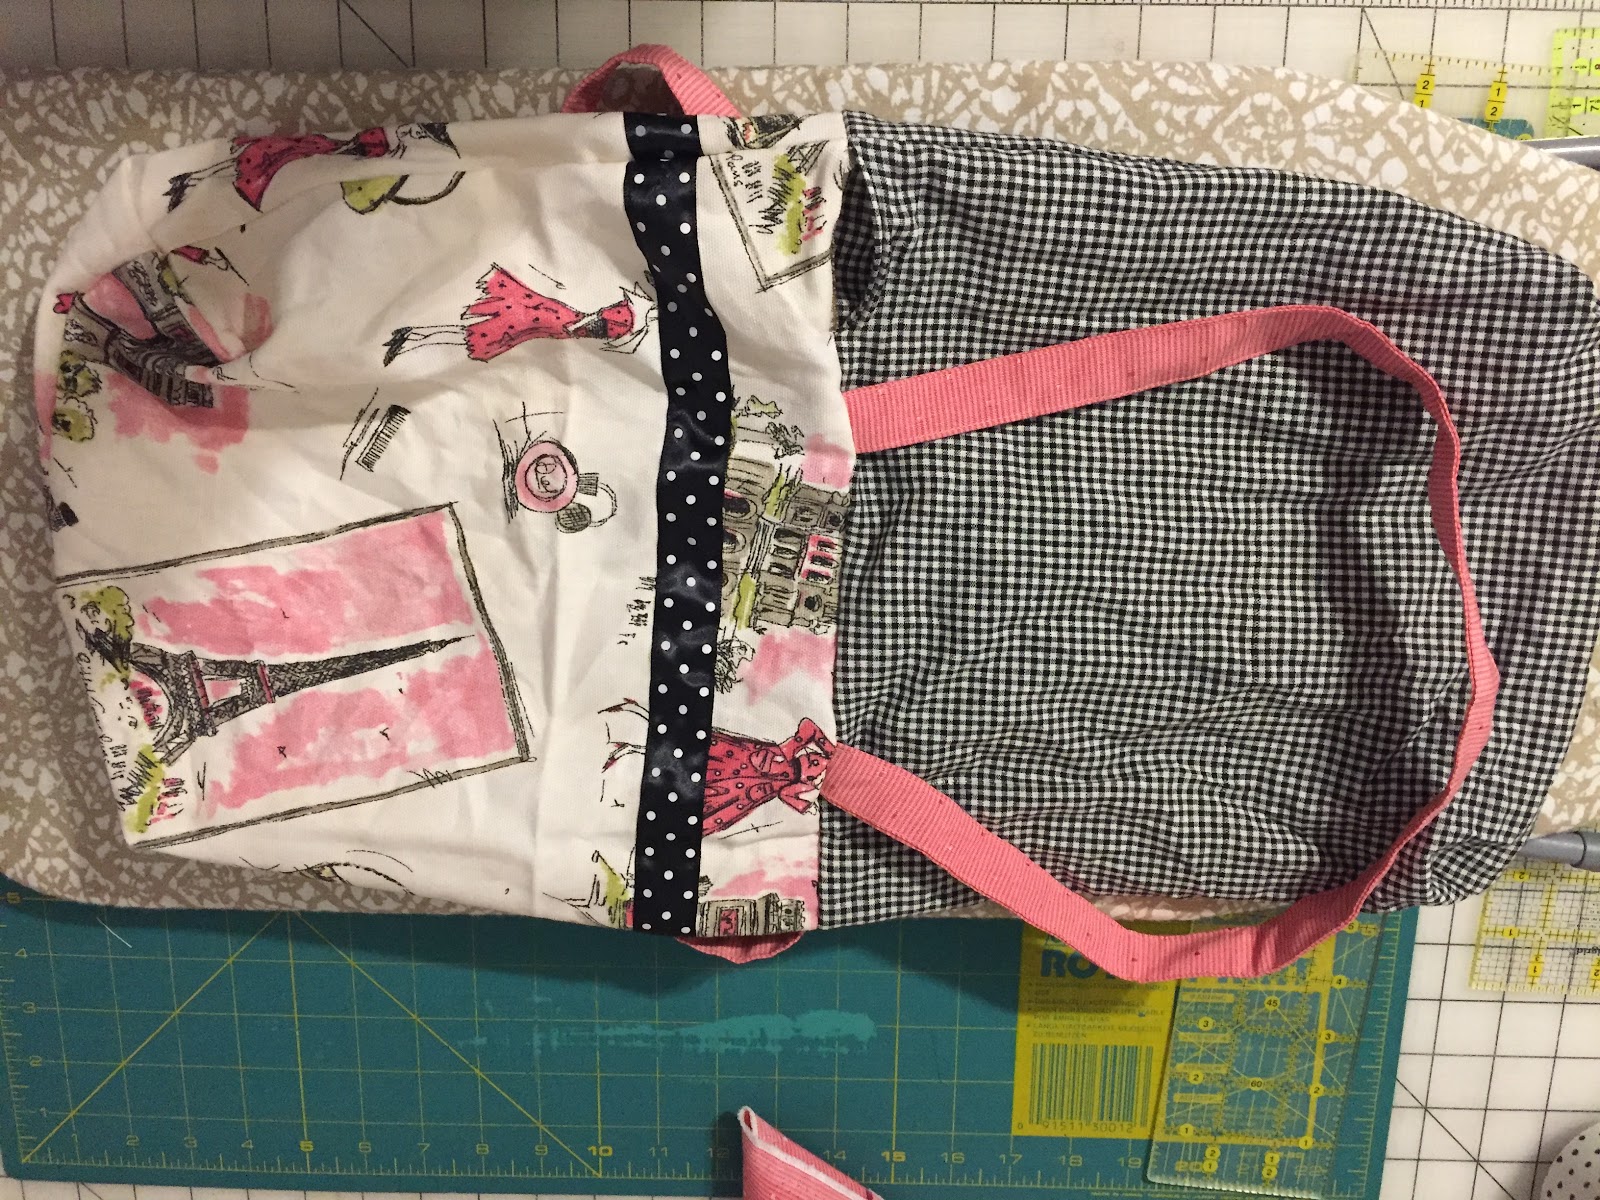
Two-color version.
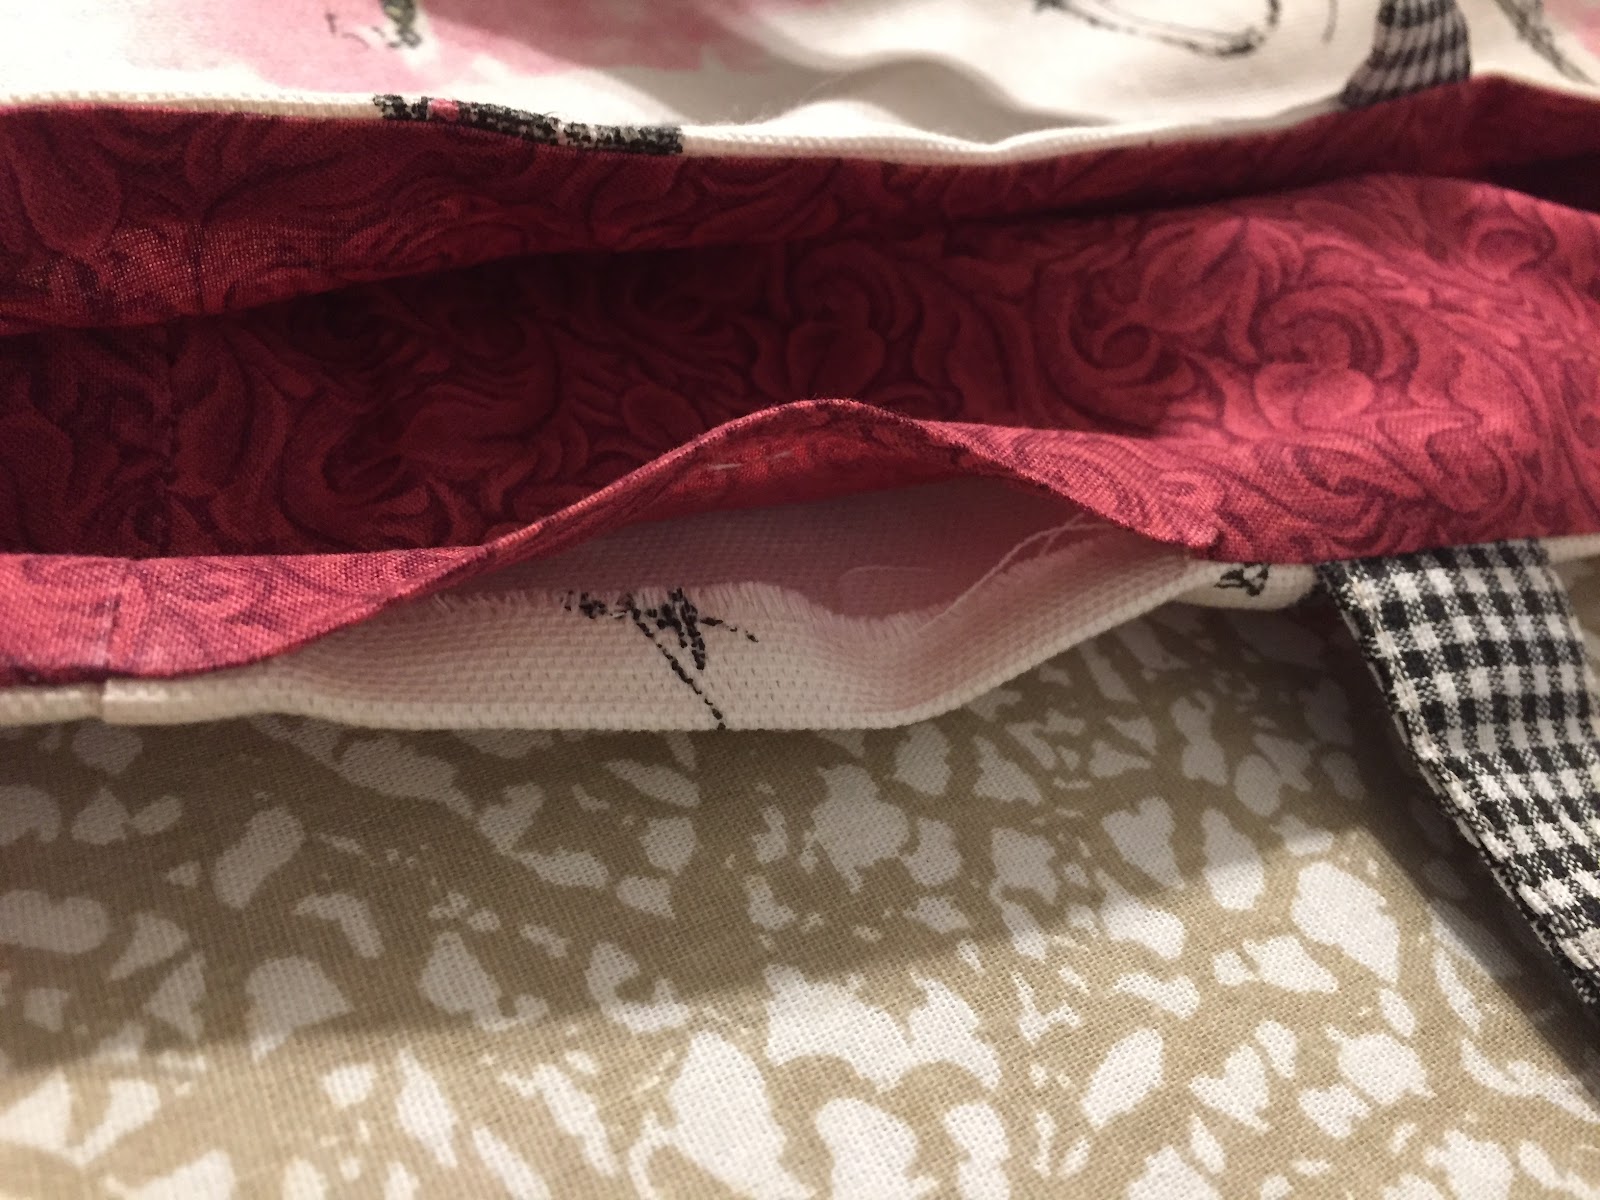
Inside pocket.

Fill it with goodies 
and go show it off !!
Wednesday, July 18, 2018

Reusable Makeup Wipe Tutorial

My daughter asked for these, then her sister, then their Besties.  There are a lot of tutorials out there and there are lots for sale on Etsy.   I was hesitant to put my own tutorial out, but since it seems to be readily available already I don't think I'm stepping on any toes.

Miaismine asked how I made them so here goes: 

Cut 2 3" flannel squares for each wipe.

cut 2 3" squares
 I like to cut a 3" x 6" piece when fabric allows.
OR a 3" x 6" rectangle


Match squares wrong sides together.  If using 6" x 3" fold in half wrong sides together.

wrong sides together

Sew around the edges with a blanket stitch, close zig zag or whatever your machine can do.  Even a double line of straight stitching would do the trick.
sew around with a finishing stitch, curving the corners

I don't sew the squared corner, but curve as I go around the corner.  This came about from trial & error.  By cutting the curve first I still had to cut again when I trimmed and it was harder to sew when the curve was already cut.

trim and ... done!
Trim as needed, trim off the corners.

Voila!!


Wash with like colors in a lingerie bag.

These become more absorbent after they are washed.

I saw sets ranging from 12 - 24 wipes on Etsy.  How many you need depends on your laundry situation.  I only made 16 for College E, but I will make her a bunch more before she heads back.

Hope you like this tutorial.

Saturday, December 17, 2016

Tooth Fairy Pillow Tutorial

The hardest part of this project was deciding what size to make the pillow.  I made the tooth first and then went with what was visually pleasing to me.

Also, for the sake of finishing in one sitting I recommend making the tooth in advance.  I used white felt and black fabric paint.  It dried overnight and was ready when I was.  

My pillow finished at approximately 9.5" x 7.5".  

First cut 2 pieces of fabric 8.5" x 10". Or one piece 10" x 16" and save yourself a seam.

Position the tooth on the right side of one piece of fabric (or fold your larger piece of  fabric in half and with the fold on the bottom position the tooth).
Sew the tooth on three sides leaving the top open.  I used a fancy buttonhole stitch on machine just because I never had used it before and this was a nice trial.  My original plan was just a straight stitch which would have worked fine.

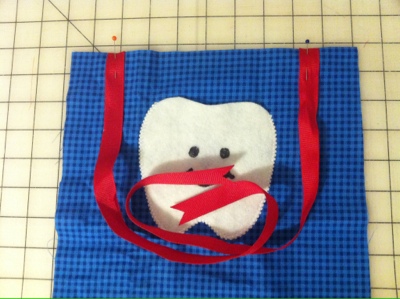
Cut 2 pieces of 3/4" or 1" wide grosgrain ribbon 18" long.  Position them 2" in from the upper corners.


Make sure they are inside the pillow and don't get caught in the seam when you sew the edges.  Don't ask me how I know that!!
Place the 2 pieces right sides together (or fold the bottom up to the top if you used a single larger piece of fabric) again making sure the ribbons are not in the seam line.  Pin them inside if in doubt. 
Sew around all open sides leaving an opening of 2"-3" for turning and stuffing on one end.  Clip corners and turn right side out. Press. 
Stuff lightly.  Make sure to get stuffing all the way into the corners.
Sew opening shut by hand. 
Enjoy!

I made this because a friend wanted to learn to sew on her machine and wanted to make a tooth fairy pillow.  This sample went to my nephew who absolutely loved it and wore it around his neck for most of Thanksgiving.

My friend used these basic guidelines, but made hers with the front out of a fun focus fabric and the back out of a solid.  She also skipped the ribbon and made it be just a pillow.  I love the flexibility to make it be whatever you want.

Saturday, April 26, 2014

How to Make "Franken Batting"

There were a few questions about how I make "Frankenbatting".  I'm sure there are lots of ways to do it, but this works for me.  Bonnie Hunter recently posted on how she does it here.  I know that I read how to do it somewhere a long time ago.  It may have been here,  also a Bonnie Hunter post.

I usually only do this for a smallish quilt, baby quilt or lap quilt.

If I have strips I work in longer pieces, but if not I start small and built up sections that build up to strips that build up to a big enough piece of batting for a quilt. 

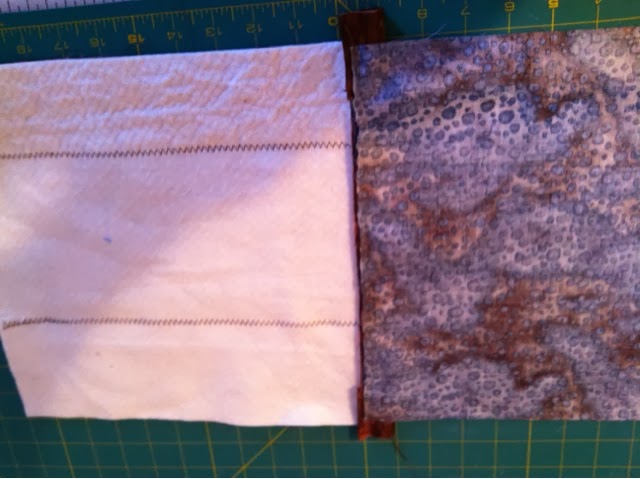
Find pieces that are about the same length.  If they are not the same length, just cut where it needs to be cut.  You can always sew it back together!

Place them slightly overlapping on the cutting table.  With the rotary cutter and ruler cut through both pieces so the edges will now butt up again each other exactly straight and matching.

Note: I used to not do this step and my batting was wavy with valleys and mountains.  This step takes extra effort but makes it a lot smoother.

I set my machine on the widest zig zag with a long stitch length and carefully join the 2 pieces.  Keep joining this way until your batting is large enough.  Square it up and use it!

Free batting.  Just a bit of effort required.

Wednesday, January 29, 2014

Humbug Bag Tutorial

My first attempt at a tutorial. We'll see how it goes.

Last year - or the year before? - there was a brief showing of "humbug" bags at my quilt guild. I thought they had potential since I have girls and nieces. Held onto the idea and pulled it from the deep recesses of my brain in time for Middle E's quinceanos party. Seemed like the perfect take home for a bunch of 14- and 15-year-olds.

For several months we picked up fabrics we liked as we saw them. The basic idea was to make a different one for each girl but all having turquoise and lime green in common.  Unfortunately, I neglected to take pictures of the finished bags.  The girls sure did ooh and aah when they were unveiled!!

 
I worked from memory of what it looked liked and logically how I thought it should go together.  There might be other better tutorials out there but this one works for me.

Supplies: 11" square of fabric; 11" square of coordinating lining; 11" square of thin batting; 9" coordinating zipper; 2 - 3"x2.5" pieces of accent fabric; 12" of 1" wide grosgrain ribbon; 2" of 1/4" grosgrain ribbon; small utility clip.  (Note: I went as small as a 9" square and 7" zipper depending on what I had.  This is a very forgiving design.)

Fold each small rectangle in half matching the 2.5" sides and sew.
Turn right side out leaving about 1/2" tucked inside.

Fit top end of zipper into the tube created from the accent rectangle with the folded
edge towards the zipper.

Center the seam in the back. Sew close to the edge.

Repeat at lower end of zipper pulling accent tube over the zipper stop so it does not show. Trim excess zipper from inside the accent pieces. (This is where you could use a shorter zipper and longer accent tabs or a longer zipper and no tabs.) Accent tabs will be slightly wider than zipper. No problem since it will get trimmed later. 


Place zipper face down on the 11" square of fabric centering it 
and lining up the edge of the zipper with the edge of the fabric. 
    Position lining over zipper. Pin in place.
You can see that I pieced my lining.  Fabric was perfect, but not the right shape.

 Using a zipper foot sew. Contrary to appearances I did not sew over the pin.

With right sides down and fabric and lining opened up, position batting on lining side.


 Fold front fabric over batting. Smooth for a good smooth fit and pin in place.

Machine quilt as desired. 
I marked a diagonal line from corner to corner with chalk then sewed on the line.

Using this handy dandy attachment I then sewed straight lines on both sides of my first line.  
To the left of the center line I used the attachment in the proper position.  
To the right of the line I attached it upside down and backwards (as shown).  

Square up the entire piece. 
This is where the forgiveness in measurements comes into play.  
I lost less than 1/4" on only 2 sides.


With right sides together match the zipper side to the opposing side.
Center and pin. Sew with a zipper foot. 

With it still inside out and with the zipper still to one side, line up the lower edges and pin.
Start sewing at the zipper end.  Oops! I pinned it backwards.

It will look like a normal rectangular bag at this point.
Reach in and pull down the zipper down at least half way (or you'll be stuck later -
wonder how I know that!!). 

The bag is still inside out. 
Now, at the top, center the zipper with the back. Pin.


Fold the 12" piece of ribbon in half wrong sides together. 
Insert ribbon into bag right in the center with raw edges sticking out between the zipper and the back. You might have to repin.

Fold the 2" ribbon the same way and position it right next to the wide ribbon.
It is harder to manipulate, so allow about 1/2" of the small ribbon to be "lost" in the seam allowance.
You only need enough left inside to attach the utility clip to and less is better so it isn't floppy.

Sew across the top making sure to catch all the ribbons and zipper accent tabs. 
Resew  for reinforcement.  Clip all corners.

 Reach in where you left it unzipped and pull out your super cute Humbug Bag.
Attach the utility clip.  This was something we added to the idea. 
Seemed to give it more character and make it more versatile.


Middle E's PVHS Shark Humbug Bag!!


For the party bags I made contrasting yo-yo and button flower decorations and attached 1, 2 or 3 (depending on the size and number of yo-yo layers) to the upper portion of the bags.  
Turned out super cute with those fun fabrics. Kicking myself for no photos.

Note to self:  Learn how to manipulate photos so they end up where and how I want them to.